Workflow Creation
This chapter demonstrates the detailed process of workflow creation with an example of sales order.
Make sure you have completed the following preparations.
- Complete the organization structure with correct companies, departments, posts and personnels.
- Create object templates, instances and their attributes, services and events.
- Make sure object instances are bound with correct data sources.
The workflow of sales order only uses a few elements that are available on the supOS platform. For details on all elements, see Element Description.
Creating Related Pages
Create pages that relate to your workflow, and make sure to link them during workflow creation.
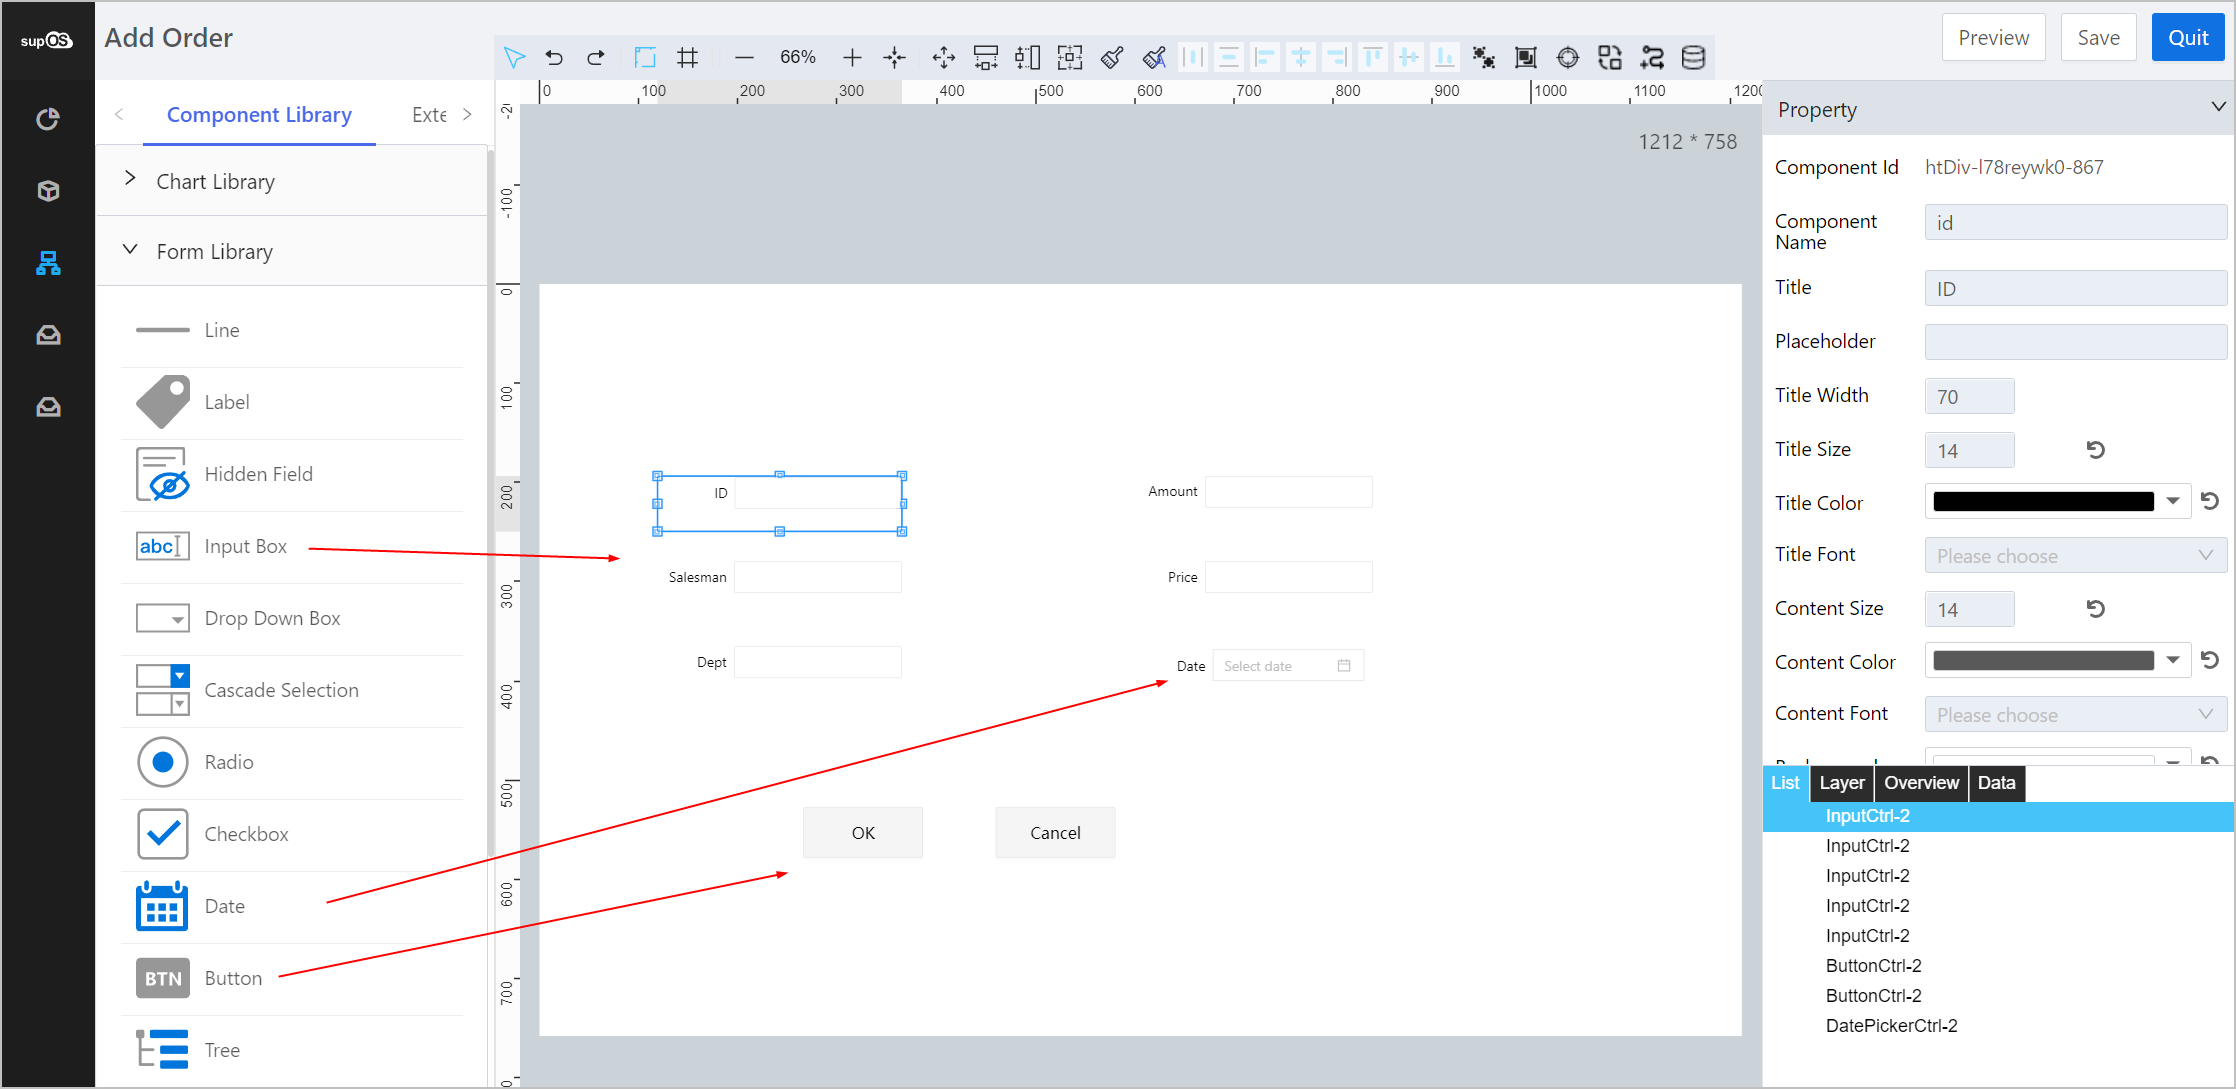
In this example, a page for adding a new sales order is needed.
- Log in to supOS, and then click
 at the upper-right corner to go to the design center.
 - Click Business Designer, click
 and enter corresponding information to create an application.
 - Enter the application, and then click Interface Design on the left side.
- Click
 at the bottom, and then enter page information.
Check Enabling Workflow checkbox to link the page in the workflow.

- Design the page and then save it.
Creating Workflow
Draw a workflow to demonstrate actual business flow with related pages and personnels.
- In Business Designer, click the Workflow Management tab.
- Click New, enter workflow information and then click Confirm.
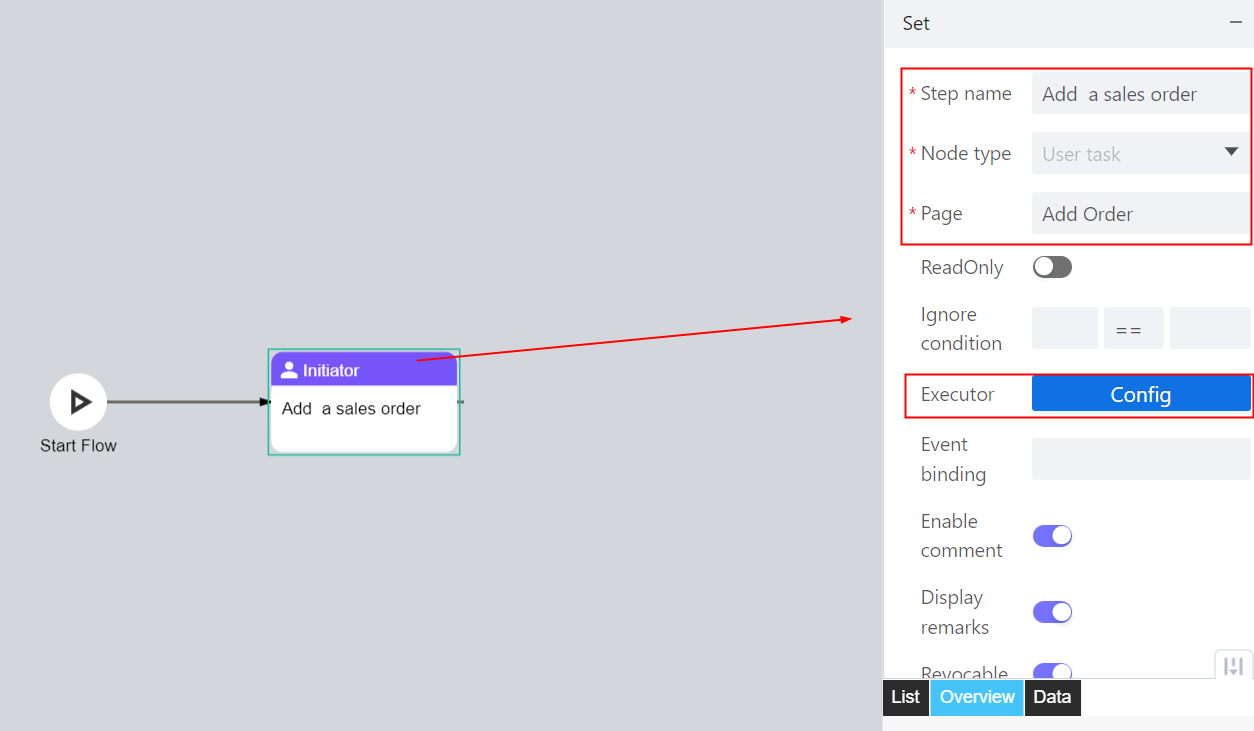
- Click the Start Flow icon, and then click
 to add a new sales order.
- Click the first step, and then enter the Step name on the right side.
- Set Node type to User task.
- Click the frame next to Page, and then select the Add Order page you just created.
- Click Config next to Executor, select a personnel as the task executor.info
In this example. the initiator is set as executor.
- Click the first step and then click to check and approve the order information.
- Set the step name and node type.
- Select the same page as the first step.
- Select an executor.info
In this example, the initiator is selected for easy operation.
- (Optional) Under Service, select a service from an instance to add the approved sales order data to thedatabase.info
The workflow can proceed without binding a service, and no data will be added to the database.
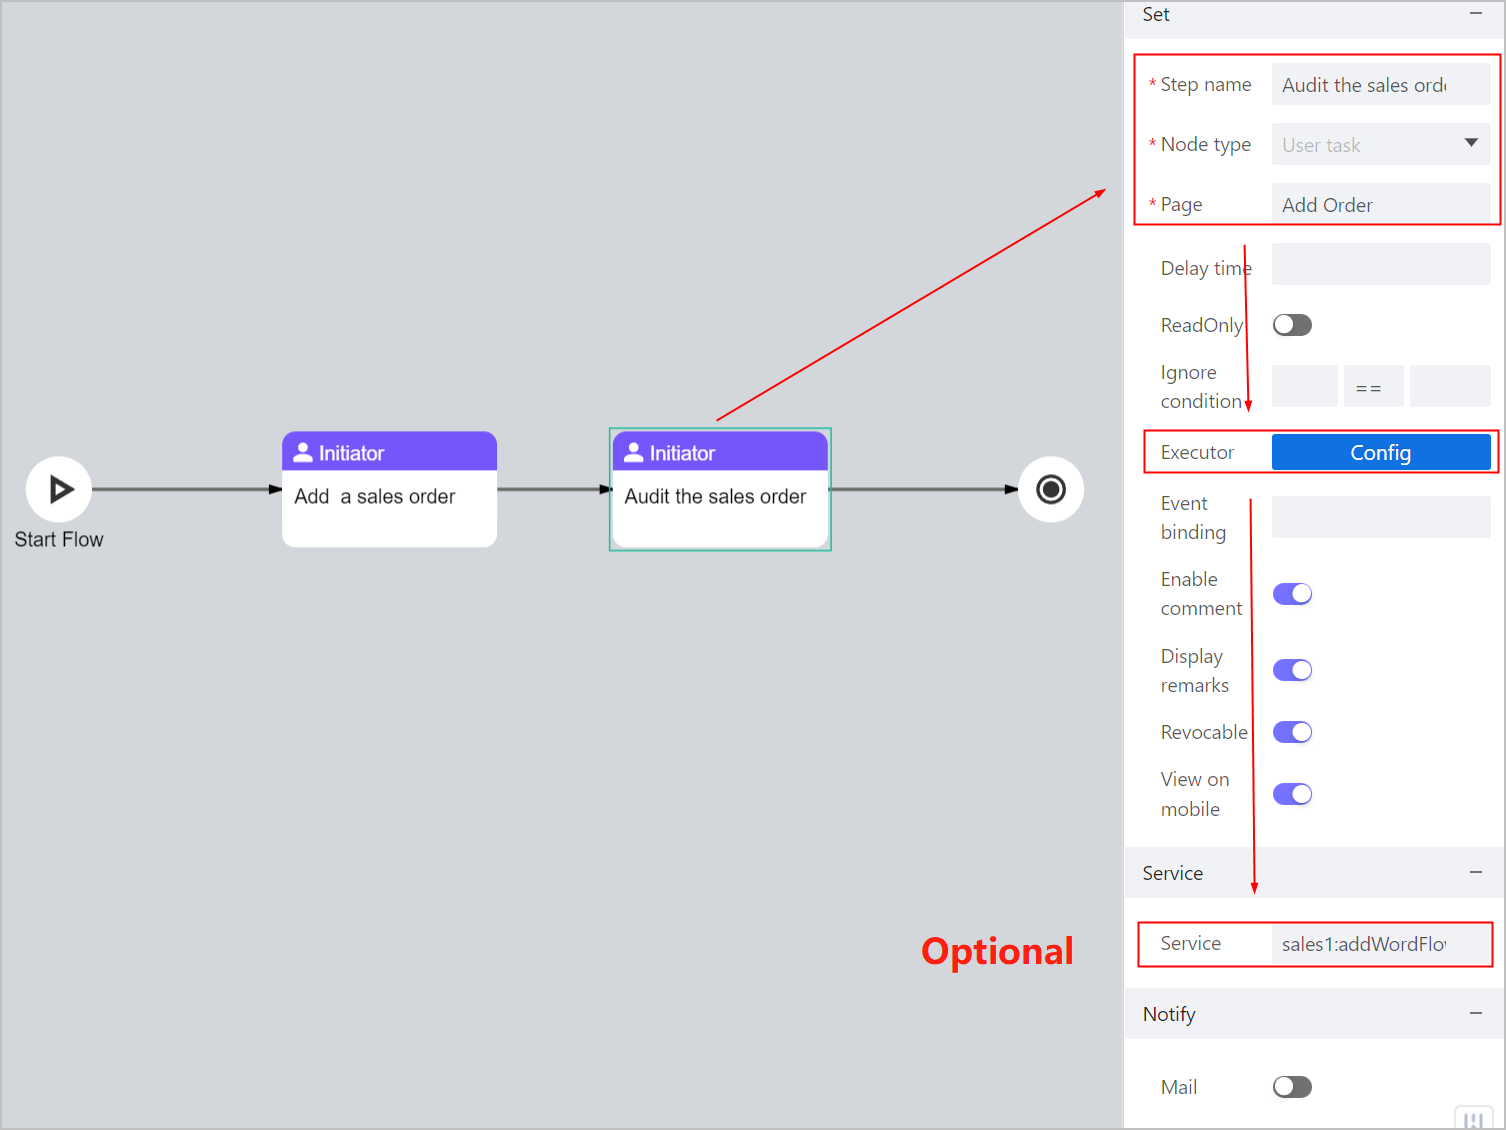
- Click
 next to the last step to end the workflow.
 - Click Publish at the upper-right corner.
To edit a published workflow, you need to upgrade it by clicking Upgrade at the upper-right corner.
Creating Workflow Page
Create another page to which the workflow applies.
- In Business Designer, click to add a new page.
Make sure to check Enabling Workflow checkbox to be able to link a workflow.
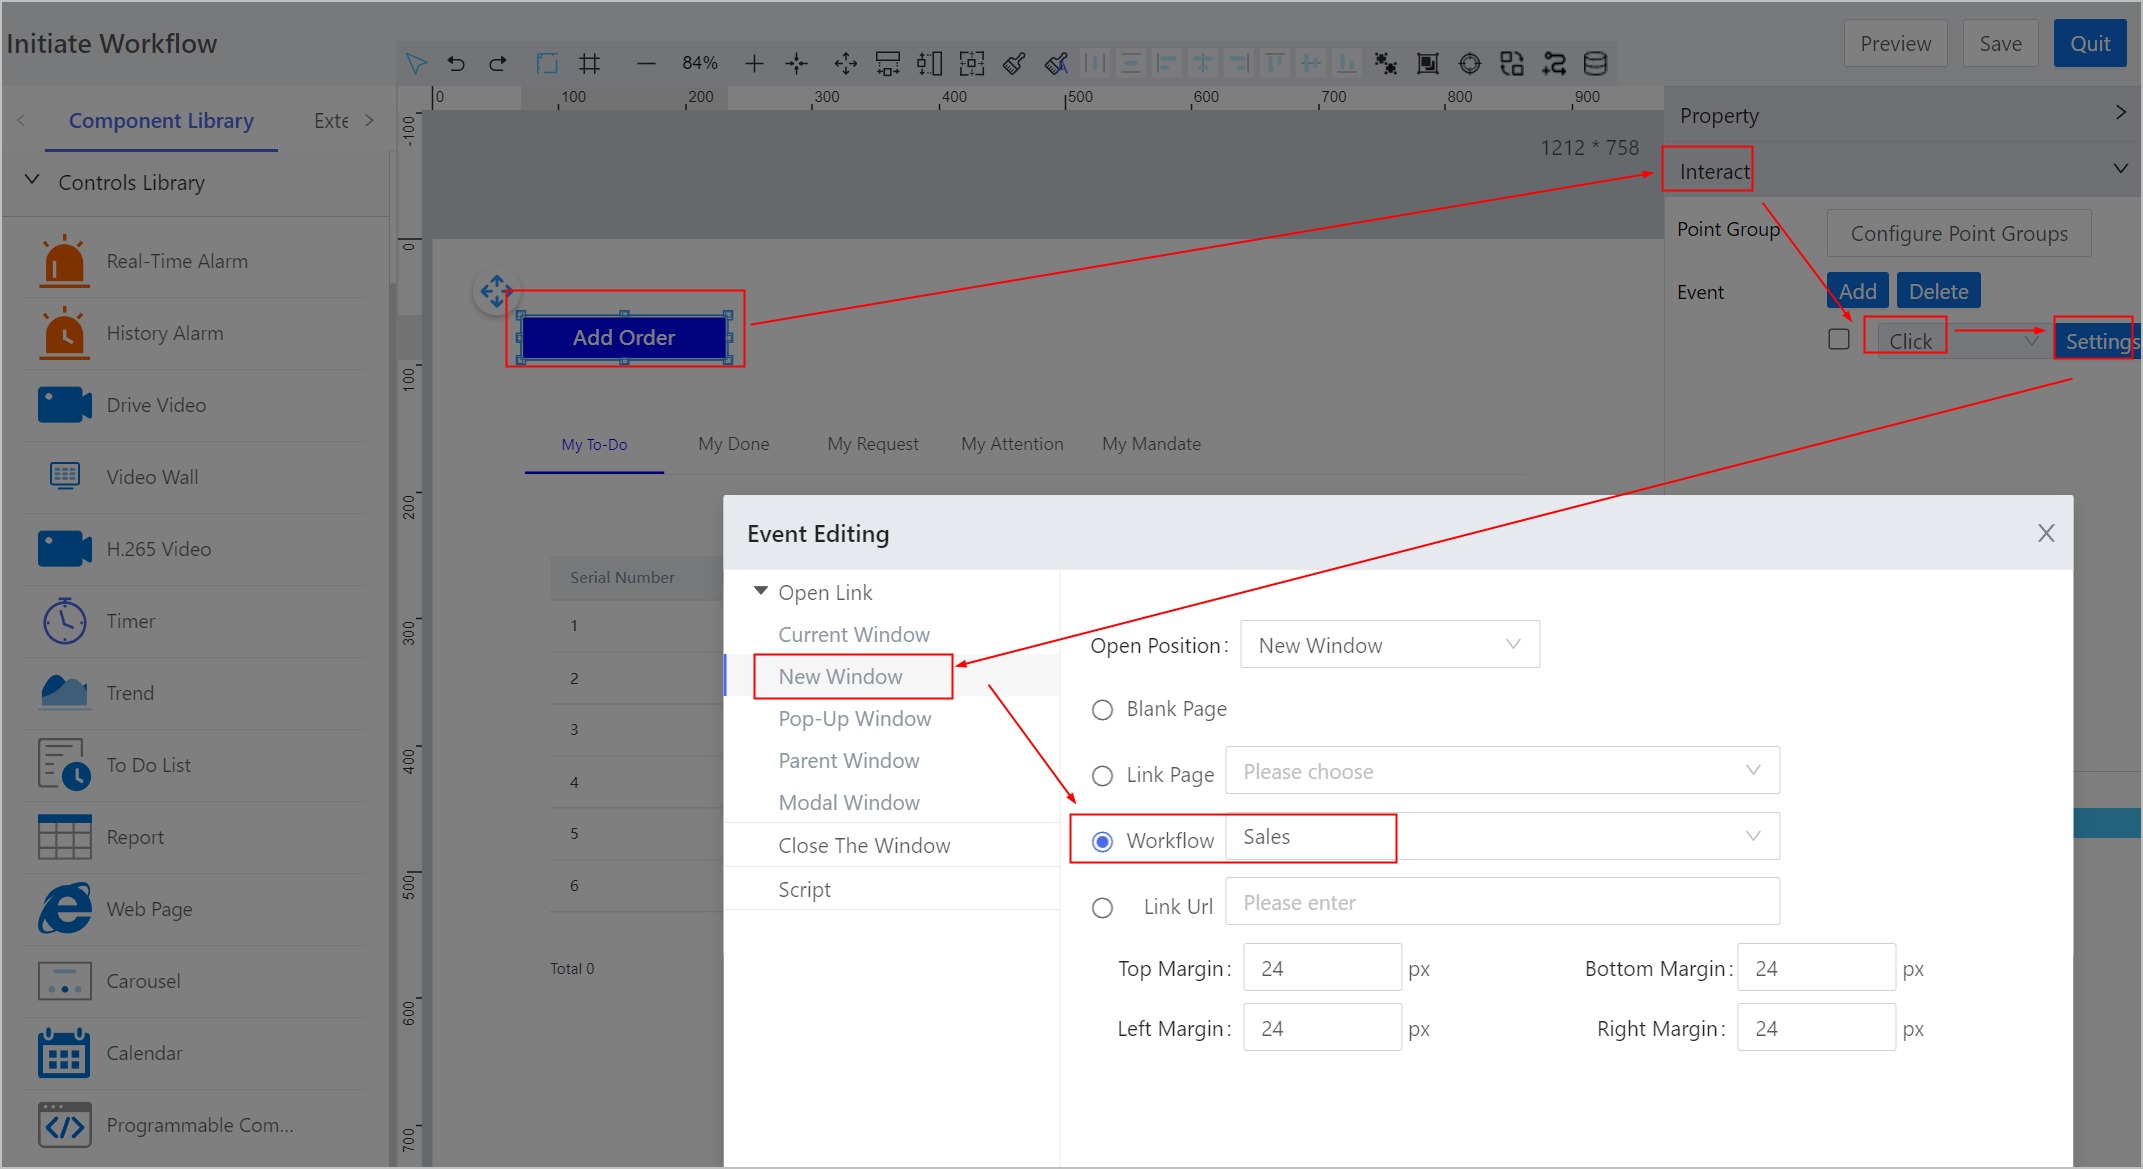
- Add a button and a to-do list on the page, and then configure the button property as needed.
- Click Interact, add a Click event to the button, and then click Setting to configure the event.
- Add the drawn workflow to the page.
- Click Finish.
Running the Workflow
- Inside the application, go to Interface Design to preview the workflow page.
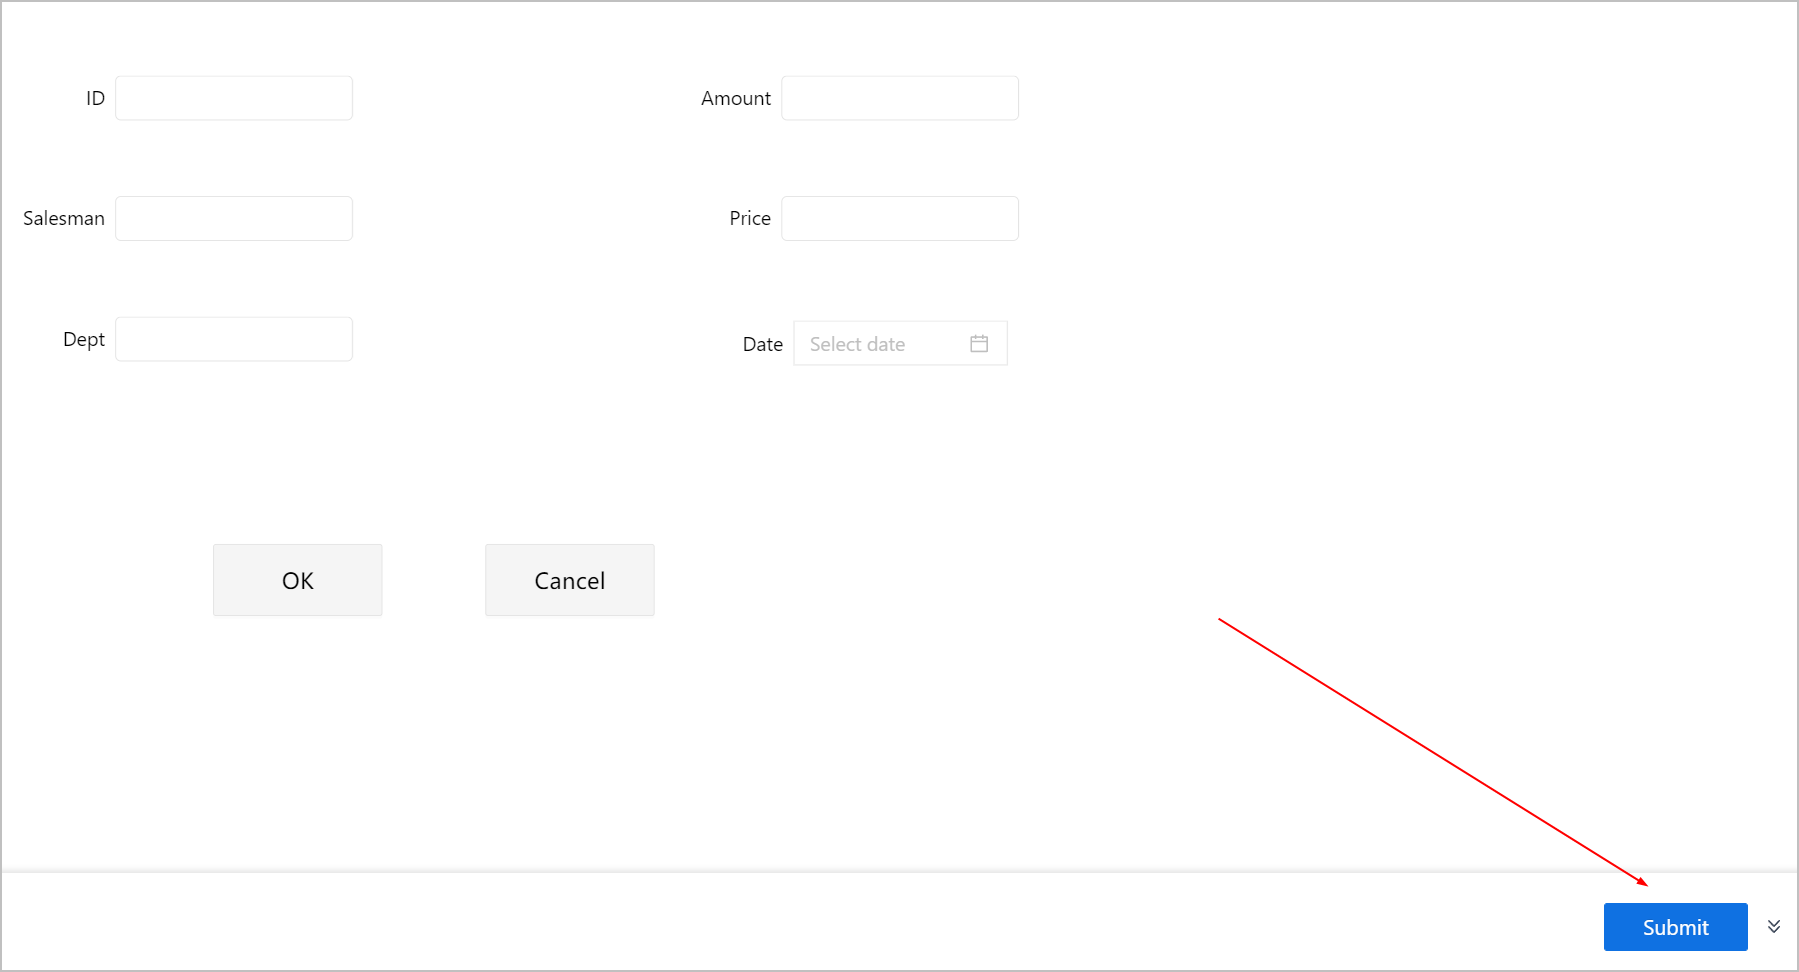
- Click the button, the page where you can add an order is displayed.
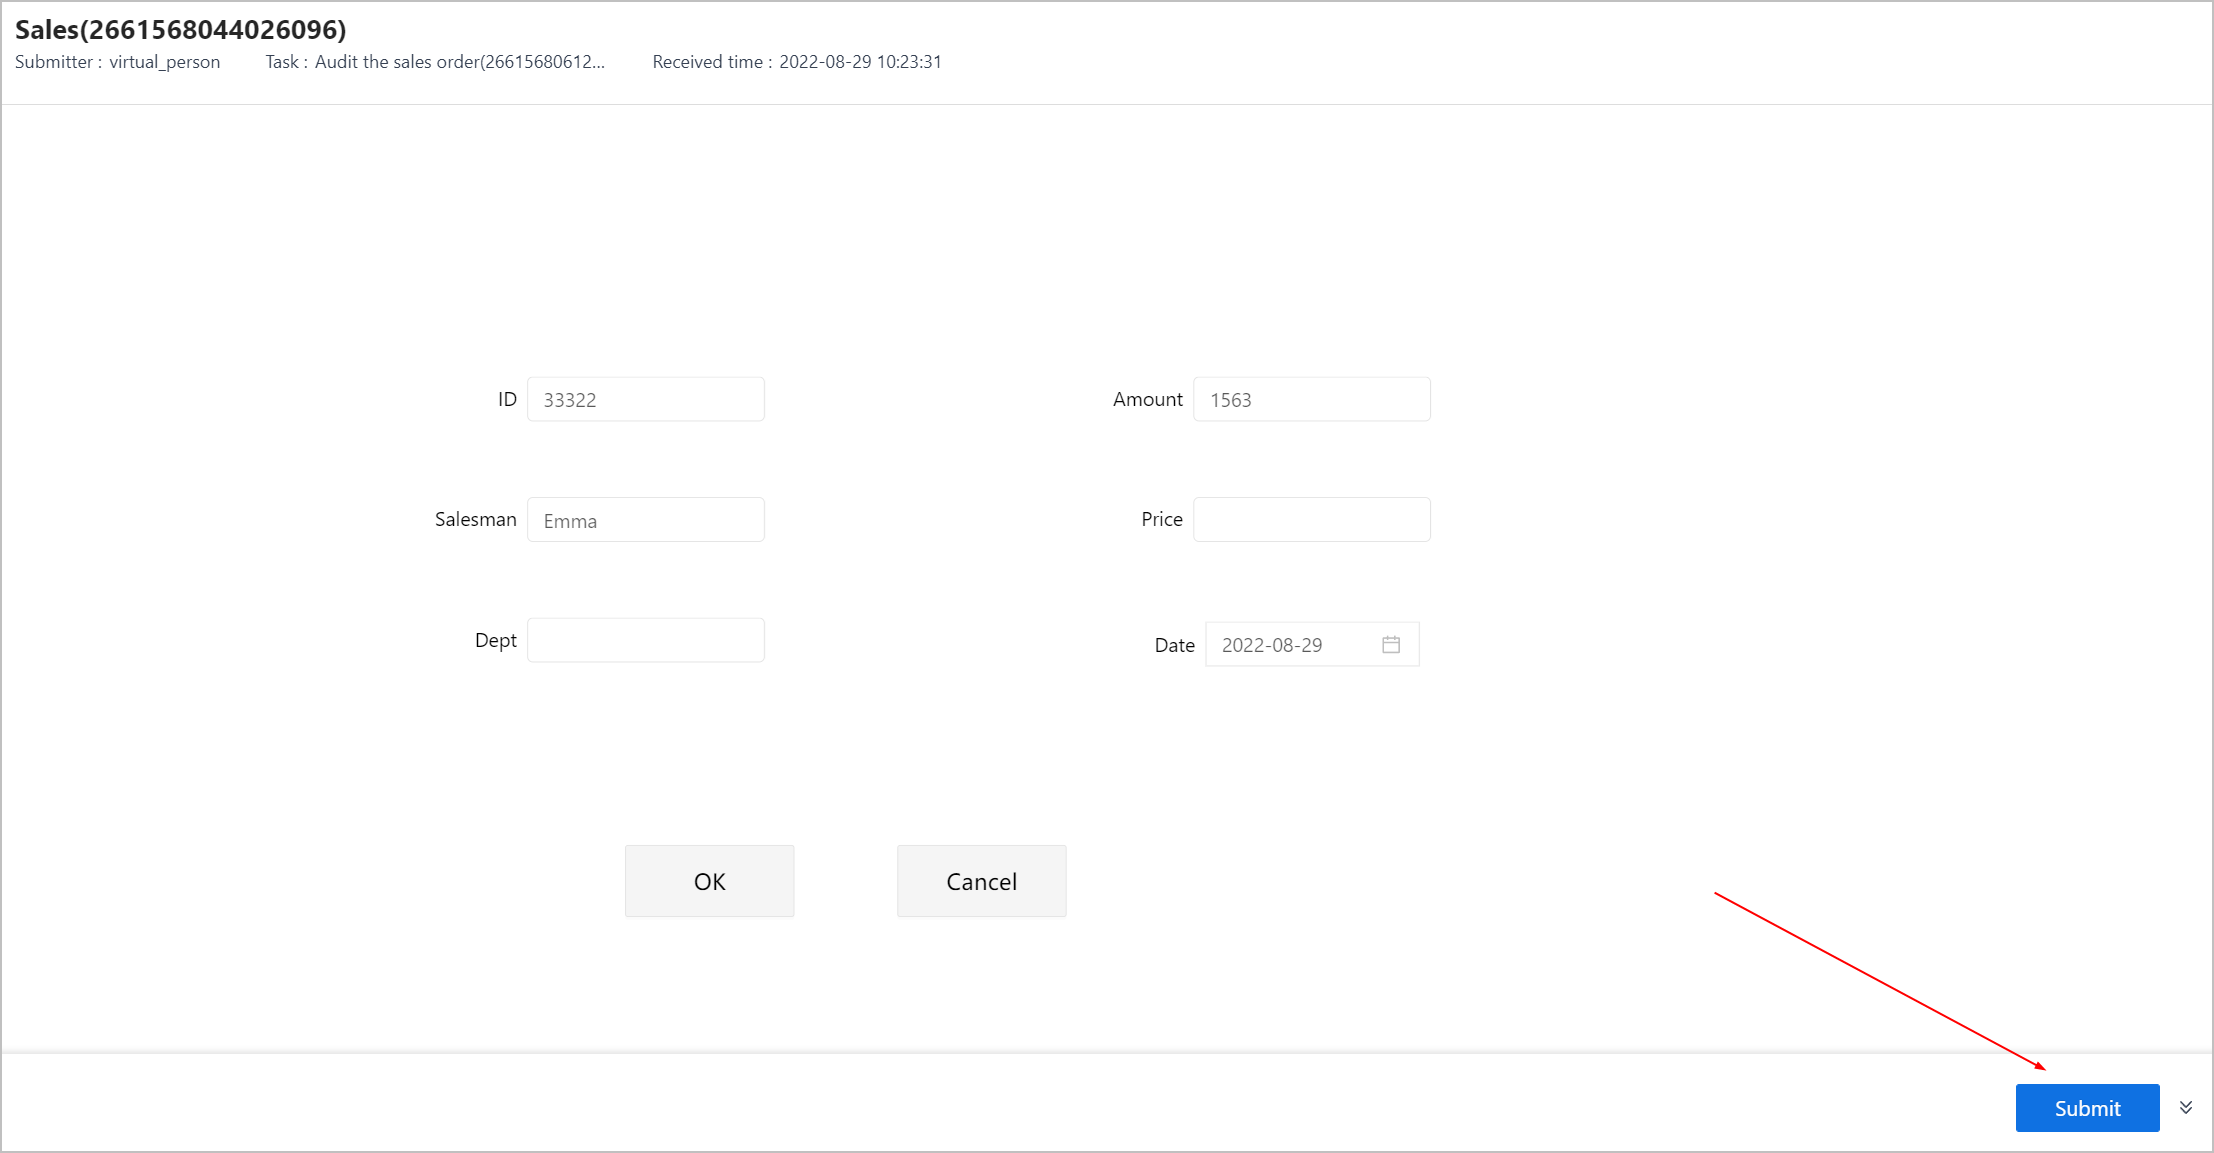
- Enter the order information, and then click Submit.
- The page is redirected to workflow page, and a new record is added to the to-do list for approval.
- Click the first record, check the order information and then click Submit.
If you have bound a service to add the approved data to the database, you can check the database to see whether the data is successfully added.